
게임을 만들다보면 사람들이 많이 놓치는 것 중에 하나가 바로 조작감이다.
좋은 게임 경험을 만들기 위해 필수적인 것으로 높은 난이도의 사이드뷰 게임일수록 중요도가 높아지는 부분이다.
플랫포머 장르에서
조작감으로 유독 언급이 많이되는 게임이 두 개가 있는데,
셀레스테 (Celeste),
할로우 나이트 (Hollow Knight)이다.


이 글에서는 두 게임을 비롯하여 사이드뷰 시점 게임에서 조작감을 어떻게 올리는 지 그 테크닉에 대해 다뤄보도록 하겠다.
Reference : Dawnosaur, Tarodev
 https://youtu.be/KKGdDBFcu0Q?si=cPdwvlpiIiV2y3rM
 https://youtu.be/3sWTzMsmdx8?si=Jf4zEby-PEZZ2yTx
기본적인 달리기 테크닉
보통 플레이어에게 이동을 부여하기 위해 기본적인 형태의 물리나 Rigidbody를 사용할 것이다.
하지만 좋은 움직임을 만들기 위해서는 이를 직접 만드는 것이 좋다.
달리기를 위해서는 달리기의 과정을 세 단계로 나눌 필요가 있다.
가속 - 최고 속도 도달 - 감속 과정이다.
가속과 감속을 “플레이어의 제어를 잘 반영하도록” 설계해야 한다.
따라서 가속과 감속이 가해질 때, 시간에 따른 속도 변화를 다음과 같이 모델링한다.

가속과 감속을 급격하게 만드는 것이다.
이는 조작을 가할 때 가해주는 힘을 플레이어에 현재 상태에 따라 적절하게 바꿔주는 것이다.
플레이어의 진행방향에 가깝게 힘이 가해질수록 힘이 작아지고, 플레이어의 진행방향에 멀어질수록 많은 힘이 가해지는 것이다.

위와 같은 방식을 사용하면 플레이어가 캐릭터를 훨씬 더 반응성 있게 조작할 수 있게 될 것이다.
위에서 설명한 물리를 구현하기 위해서는 캐릭터가 달리기 중일 때 오브젝트의 속도를 최대로 고정한 채로 힘을 조정하여 가속과 감속을 가해주는 방식으로 구현하면 될 것이다.
유니티에서는 다음과 같이 구현할 수 있겠다.
float targetSpeed = _moveInput.x * Data.runMaxSpeed;
targetSpeed = Mathf.Lerp(Rigidbody.velocity.x, targetSpeed, lerpAmount);
accelRate = (Mathf.Abs(targetSpeed) > 0.01f) ? Data.runAccelAmount : Data.runDeccelAmount;
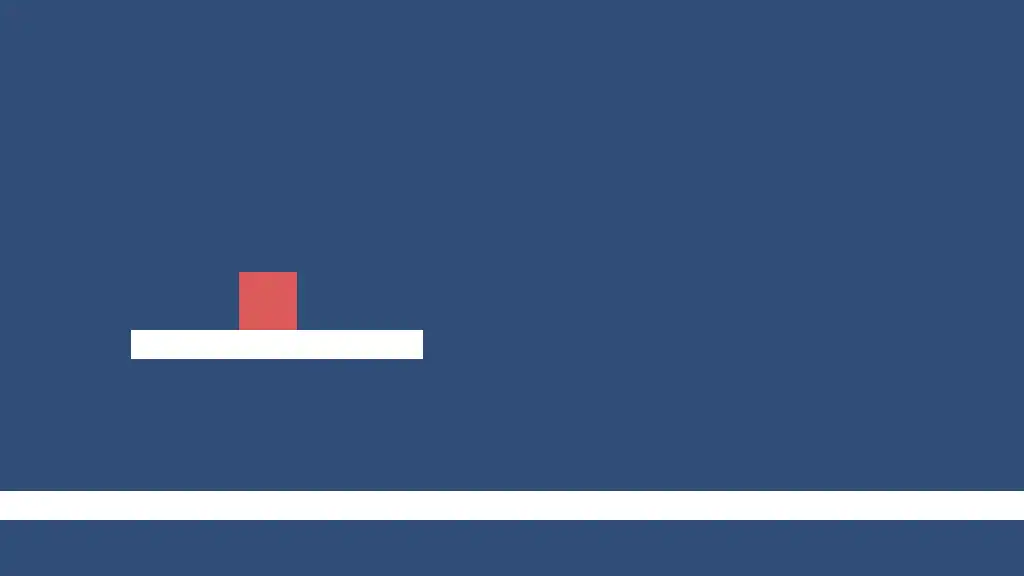
매력적인 점프 구현하기
점프를 어떻게 구현할까?
대부분의 경우는 캐릭터가 땅에 닿아있는 경우에, 점프키를 누르면, 올라갔다 떨어진다! 가 끝일 것이다.
하지만 좋은 플랫포머 게임들은 조작감을 위해 많은 장치를 숨겨놓았다.
특히나 사이드뷰 시점 게임에서는 점프가 좌우이동만큼이나 중요하기 때문에 이를 플레이어가 최대한 반응성있게 설계하는 것이 중요 포인트이다.
대표적인 몇 가지 테크닉들을 소개해보겠다.
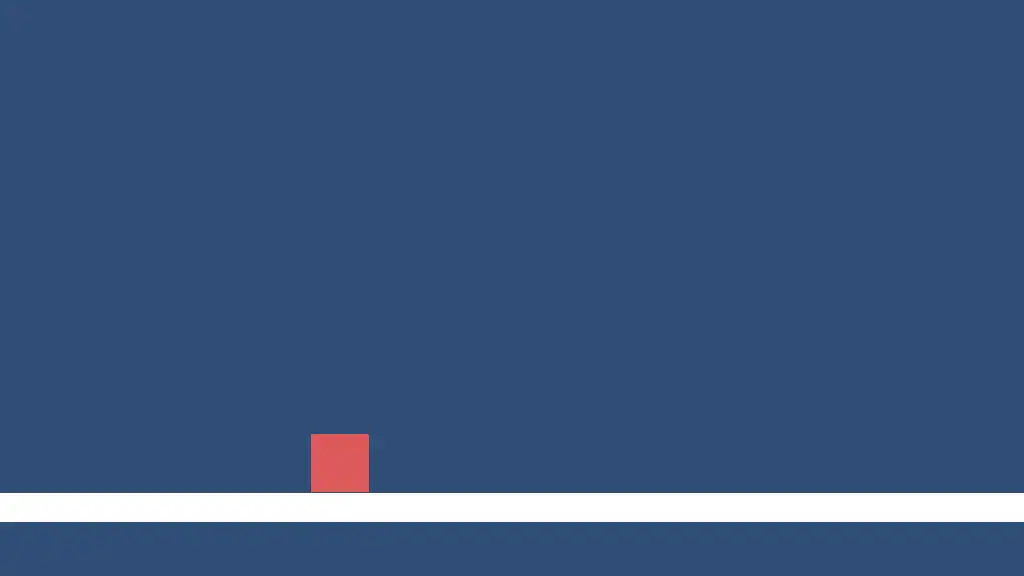
1) 코요테 타임 (Coyote Time)
코요테 타임 (Coyote Time)은 점프의 허용에 일종의 여유 시간을 두는 것이다.
구현은 간단하지만, 사용자의 경험에 매우 많은 차이를 낳는다.
코루틴을 쓰든
Time.deltaTime으로 시간을 직접 세서 구현하든 본인 자유.
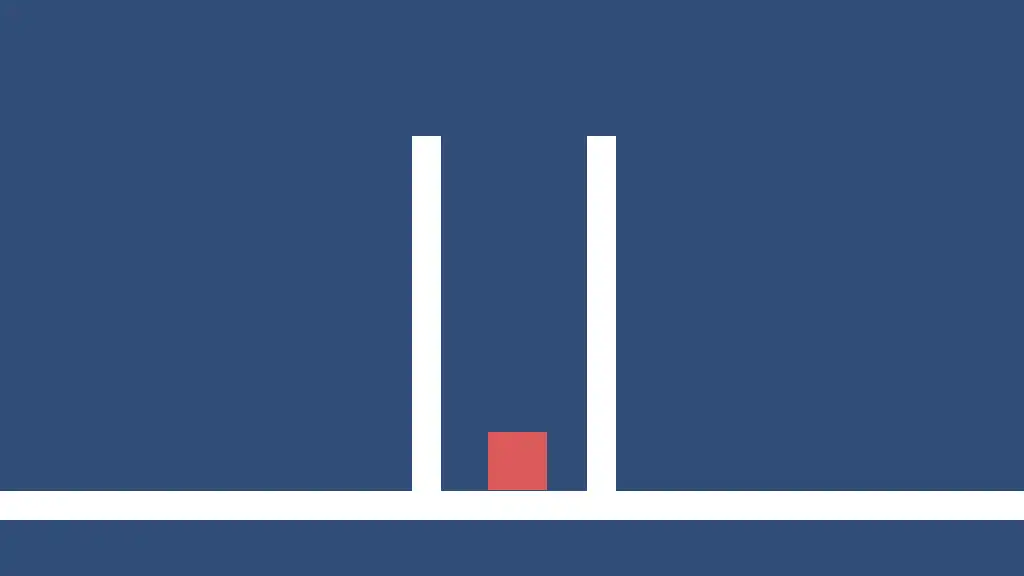
2) 점프 버퍼 (Jump buffer)
보통의 게임들에서 선입력이라고 일컬어지는, 특정 조작이 Disable한 시점에도 그 조작을 버퍼에 저장해놨다가, Enable되는 시점에서 저장된 조작들을 차례대로 Release해주는 테크닉이다.
플랫포머 게임에서는 주로 점프에 많이 사용된다.
1번과 2번 테크닉은 즉, 점프가 가능한 타이밍을 앞뒤로 약간씩 여유분을 두어 점프의 반응 시간을 늘리겠다는 이야기이다.
3) 그 외 잡다
그 외에도 여러 가지 방법들이 있다.
앞서 말한 가속과 감속 같이 상승과 하강은 최대한 빠르게 하고 고점(Apex)에서 머무르는 시간은 최대한 길게 한다던지,
점프키를 떼면 그 즉시 상승을 멈추는 점프 컷 (숏점프) 같은 것들이 있겠다.

벽점프나 대쉬 같은 것들도 있겠다.
대부분의 플랫포머 게임들은 다음의 테크닉들을 유지한 채, 이런저런 수치들만 조정하여 그 게임만의 특유의 조작감을 구현해낸다.
다음의 깃허브에서
셀레스테, 할로우 나이트, 슈퍼 미트 보이의
움직임을 구현한 프로젝트가 있다.
해당 수치를 참고하여 플랫포머 게임에 반영해보자.
https://github.com/DawnosaurDev/platformer-movement
참고) 예제 코드 개선
유튜브 튜토리얼의 참고 예제 코드를 보다보니, 약간 불만인 것들이 있었다.
- 바닥과 벽의 충돌 판정을 위해 캐릭터 하위에 충돌용 오브젝트를 추가시켜줘야 한다는 점
- 유니티의 New Input System이 적용되지 않았다는 점
두 가지를 고려하여 다음과 같이 코드를 수정했다.
PlayerMovement.cs
using UnityEngine;

[RequireComponent(typeof(Rigidbody2D), typeof(CapsuleCollider2D))]
public class PlayerController : MonoBehaviour
{
	//Scriptable object which holds all the player's movement parameters. If you don't want to use it
	//just paste in all the parameters, though you will need to manuly change all references in this script

	//HOW TO: to add the scriptable object, right-click in the project window -> create -> Player Data
	//Next, drag it into the slot in playerMovement on your player

	[SerializeField] private PlayerControllerSO Data;

	#region Variables
	//Components
	public Rigidbody2D Rigidbody { get; private set; }
	public CapsuleCollider2D Collider { get; private set; }

	public PlayerInputActions InputActions { get; private set; }
	public PlayerInputActions.PlayerActions PlayerActions { get; private set; }

	//Variables control the various actions the player can perform at any time.
	//These are fields which can are public allowing for other sctipts to read them
	//but can only be privately written to.
	public bool IsFacingRight { get; private set; }
	public bool IsJumping { get; private set; }
	public bool IsWallJumping { get; private set; }
	public bool IsSliding { get; private set; }

	//Timers (also all fields, could be private and a method returning a bool could be used)
	public float LastOnGroundTime { get; private set; }
	public float LastOnWallTime { get; private set; }
	public float LastOnWallRightTime { get; private set; }
	public float LastOnWallLeftTime { get; private set; }

	//Jump
	private bool _isJumpCut;
	private bool _isJumpFalling;

	//Wall Jump
	private float _wallJumpStartTime;
	private int _lastWallJumpDir;

	private Vector2 _moveInput;
	public float LastPressedJumpTime { get; private set; }

    [Header("Layers & Tags")]
	[SerializeField] private LayerMask _groundLayer;
	#endregion

    private void Awake()
	{
		Rigidbody = GetComponent<Rigidbody2D>();
		Collider = GetComponent<CapsuleCollider2D>();

		InputActions = new PlayerInputActions();
		PlayerActions = InputActions.Player;
	}

	private void Start()
	{
		PlayerActions.Move.started += (context) =>
		{
			_moveInput = context.ReadValue<Vector2>();
			CheckDirectionToFace(_moveInput.x > 0);
		};
		PlayerActions.Move.canceled += _ => _moveInput = Vector2.zero;
		PlayerActions.Jump.started += _ => OnJumpInput();
		PlayerActions.Jump.canceled += _ => OnJumpUpInput();
		SetGravityScale(Data.gravityScale);
		IsFacingRight = true;
	}

	private void OnEnable()
	{
		InputActions.Enable();
	}

	private void OnDisable()
	{
		InputActions.Disable();
	}

  private void Update()
	{
    #region TIMERS
    LastOnGroundTime -= Time.deltaTime;
		LastOnWallTime -= Time.deltaTime;
		LastOnWallRightTime -= Time.deltaTime;
		LastOnWallLeftTime -= Time.deltaTime;

		LastPressedJumpTime -= Time.deltaTime;
		#endregion

		#region COLLISION CHECKS
		if (!IsJumping)
		{
			//Ground Check
			if ( Physics2D.CapsuleCast(Collider.bounds.center,Collider.size, Collider.direction, 0, Vector2.down, Data.GrounderDistance, _groundLayer) && !IsJumping) //checks if set box overlaps with ground
			{
				LastOnGroundTime = Data.coyoteTime; //if so sets the lastGrounded to coyoteTime
            }

			//Right Wall Check
			if (((Physics2D.CapsuleCast(Collider.bounds.center,Collider.size, Collider.direction, 0, Vector2.right, Data.WallDistance, _groundLayer) && IsFacingRight)
					|| (Physics2D.CapsuleCast(Collider.bounds.center, Collider.size, Collider.direction, 0, Vector2.left, Data.WallDistance, _groundLayer) && !IsFacingRight)) && !IsWallJumping)
				LastOnWallRightTime = Data.coyoteTime;

			//Left Wall Check
			if (((Physics2D.CapsuleCast(Collider.bounds.center, Collider.size, Collider.direction, 0, Vector2.right, Data.WallDistance, _groundLayer) && !IsFacingRight)
				|| (Physics2D.CapsuleCast(Collider.bounds.center, Collider.size, Collider.direction, 0, Vector2.left, Data.WallDistance, _groundLayer) && IsFacingRight)) && !IsWallJumping)
				LastOnWallLeftTime = Data.coyoteTime;

			//Two checks needed for both left and right walls since whenever the play turns the wall checkPoints swap sides
			LastOnWallTime = Mathf.Max(LastOnWallLeftTime, LastOnWallRightTime);
		}
		#endregion

		#region JUMP CHECKS
		if (IsJumping && Rigidbody.velocity.y < 0)
		{
			IsJumping = false;

			if(!IsWallJumping)
				_isJumpFalling = true;
		}

		if (IsWallJumping && Time.time - _wallJumpStartTime > Data.wallJumpTime)
		{
			IsWallJumping = false;
		}

		if (LastOnGroundTime > 0 && !IsJumping && !IsWallJumping)
        {
			_isJumpCut = false;

			if(!IsJumping)
				_isJumpFalling = false;
		}

		//Jump
		if (CanJump() && LastPressedJumpTime > 0)
		{
			IsJumping = true;
			IsWallJumping = false;
			_isJumpCut = false;
			_isJumpFalling = false;
			Jump();
		}
		//WALL JUMP
		else if (CanWallJump() && LastPressedJumpTime > 0)
		{
			IsWallJumping = true;
			IsJumping = false;
			_isJumpCut = false;
			_isJumpFalling = false;
			_wallJumpStartTime = Time.time;
			_lastWallJumpDir = (LastOnWallRightTime > 0) ? -1 : 1;

			WallJump(_lastWallJumpDir);
		}
		#endregion

		#region SLIDE CHECKS
		if (CanSlide() && ((LastOnWallLeftTime > 0 && _moveInput.x < 0) || (LastOnWallRightTime > 0 && _moveInput.x > 0)))
			IsSliding = true;
		else
			IsSliding = false;
		#endregion

		#region GRAVITY
		//Higher gravity if we've released the jump input or are falling
		if (IsSliding)
		{
			SetGravityScale(0);
		}
		else if (Rigidbody.velocity.y < 0 && _moveInput.y < 0)
		{
			//Much higher gravity if holding down
			SetGravityScale(Data.gravityScale * Data.fastFallGravityMult);
			//Caps maximum fall speed, so when falling over large distances we don't accelerate to insanely high speeds
			Rigidbody.velocity = new Vector2(Rigidbody.velocity.x, Mathf.Max(Rigidbody.velocity.y, -Data.maxFastFallSpeed));
		}
		else if (_isJumpCut)
		{
			//Higher gravity if jump button released
			SetGravityScale(Data.gravityScale * Data.jumpCutGravityMult);
			Rigidbody.velocity = new Vector2(Rigidbody.velocity.x, Mathf.Max(Rigidbody.velocity.y, -Data.maxFallSpeed));
		}
		else if ((IsJumping || IsWallJumping || _isJumpFalling) && Mathf.Abs(Rigidbody.velocity.y) < Data.jumpHangTimeThreshold)
		{
			SetGravityScale(Data.gravityScale * Data.jumpHangGravityMult);
		}
		else if (Rigidbody.velocity.y < 0)
		{
			//Higher gravity if falling
			SetGravityScale(Data.gravityScale * Data.fallGravityMult);
			//Caps maximum fall speed, so when falling over large distances we don't accelerate to insanely high speeds
			Rigidbody.velocity = new Vector2(Rigidbody.velocity.x, Mathf.Max(Rigidbody.velocity.y, -Data.maxFallSpeed));
		}
		else
		{
			//Default gravity if standing on a platform or moving upwards
			SetGravityScale(Data.gravityScale);
		}
		#endregion
    }

    private void FixedUpdate()
	{
		//Handle Run
		if (IsWallJumping)
			Run(Data.wallJumpRunLerp);
		else
			Run(1);

		//Handle Slide
		if (IsSliding)
			Slide();
    }

    #region INPUT CALLBACKS
	//Methods which whandle input detected in Update()
    public void OnJumpInput()
	{
		LastPressedJumpTime = Data.jumpInputBufferTime;
	}

	public void OnJumpUpInput()
	{
		if (CanJumpCut() || CanWallJumpCut())
			_isJumpCut = true;
	}
    #endregion

    #region GENERAL METHODS
    public void SetGravityScale(float scale)
	{
		Rigidbody.gravityScale = scale;
	}
    #endregion

	//MOVEMENT METHODS
    #region RUN METHODS
    private void Run(float lerpAmount)
	{
		//Calculate the direction we want to move in and our desired velocity
		float targetSpeed = _moveInput.x * Data.runMaxSpeed;
		//We can reduce are control using Lerp() this smooths changes to are direction and speed
		targetSpeed = Mathf.Lerp(Rigidbody.velocity.x, targetSpeed, lerpAmount);

		#region Calculate AccelRate
		float accelRate;

		//Gets an acceleration value based on if we are accelerating (includes turning)
		//or trying to decelerate (stop). As well as applying a multiplier if we're air borne.
		if (LastOnGroundTime > 0)
			accelRate = (Mathf.Abs(targetSpeed) > 0.01f) ? Data.runAccelAmount : Data.runDeccelAmount;
		else
			accelRate = (Mathf.Abs(targetSpeed) > 0.01f) ? Data.runAccelAmount * Data.accelInAir : Data.runDeccelAmount * Data.deccelInAir;
		#endregion

		#region Add Bonus Jump Apex Acceleration
		//Increase are acceleration and maxSpeed when at the apex of their jump, makes the jump feel a bit more bouncy, responsive and natural
		if ((IsJumping || IsWallJumping || _isJumpFalling) && Mathf.Abs(Rigidbody.velocity.y) < Data.jumpHangTimeThreshold)
		{
			accelRate *= Data.jumpHangAccelerationMult;
			targetSpeed *= Data.jumpHangMaxSpeedMult;
		}
		#endregion

		#region Conserve Momentum
		//We won't slow the player down if they are moving in their desired direction but at a greater speed than their maxSpeed
		if(Data.doConserveMomentum && Mathf.Abs(Rigidbody.velocity.x) > Mathf.Abs(targetSpeed) && Mathf.Sign(Rigidbody.velocity.x) == Mathf.Sign(targetSpeed) && Mathf.Abs(targetSpeed) > 0.01f && LastOnGroundTime < 0)
		{
			//Prevent any deceleration from happening, or in other words conserve are current momentum
			//You could experiment with allowing for the player to slightly increae their speed whilst in this "state"
			accelRate = 0;
		}
		#endregion

		//Calculate difference between current velocity and desired velocity
		float speedDif = targetSpeed - Rigidbody.velocity.x;
		//Calculate force along x-axis to apply to thr player

		float movement = speedDif * accelRate;

		//Convert this to a vector and apply to rigidbody
		Rigidbody.AddForce(movement * Vector2.right, ForceMode2D.Force);

		/*
		 * For those interested here is what AddForce() will do
		 * RB.velocity = new Vector2(RB.velocity.x + (Time.fixedDeltaTime  * speedDif * accelRate) / RB.mass, RB.velocity.y);
		 * Time.fixedDeltaTime is by default in Unity 0.02 seconds equal to 50 FixedUpdate() calls per second
		*/
	}

	private void Turn()
	{
		//stores scale and flips the player along the x axis,
		Vector3 scale = transform.localScale;
		scale.x *= -1;
		transform.localScale = scale;

		IsFacingRight = !IsFacingRight;
	}
    #endregion

    #region JUMP METHODS
    private void Jump()
	{
		//Ensures we can't call Jump multiple times from one press
		LastPressedJumpTime = 0;
		LastOnGroundTime = 0;

		#region Perform Jump
		//We increase the force applied if we are falling
		//This means we'll always feel like we jump the same amount
		//(setting the player's Y velocity to 0 beforehand will likely work the same, but I find this more elegant :D)
		float force = Data.jumpForce;
		if (Rigidbody.velocity.y < 0)
			force -= Rigidbody.velocity.y;

		Rigidbody.AddForce(Vector2.up * force, ForceMode2D.Impulse);
		#endregion
	}

	private void WallJump(int dir)
	{
		//Ensures we can't call Wall Jump multiple times from one press
		LastPressedJumpTime = 0;
		LastOnGroundTime = 0;
		LastOnWallRightTime = 0;
		LastOnWallLeftTime = 0;

		#region Perform Wall Jump
		Vector2 force = new Vector2(Data.wallJumpForce.x, Data.wallJumpForce.y);
		force.x *= dir; //apply force in opposite direction of wall

		if (Mathf.Sign(Rigidbody.velocity.x) != Mathf.Sign(force.x))
			force.x -= Rigidbody.velocity.x;

		if (Rigidbody.velocity.y < 0) //checks whether player is falling, if so we subtract the velocity.y (counteracting force of gravity). This ensures the player always reaches our desired jump force or greater
			force.y -= Rigidbody.velocity.y;

		//Unlike in the run we want to use the Impulse mode.
		//The default mode will apply are force instantly ignoring masss
		Rigidbody.AddForce(force, ForceMode2D.Impulse);
		#endregion
	}
	#endregion

	#region OTHER MOVEMENT METHODS
	private void Slide()
	{
		//Works the same as the Run but only in the y-axis
		//THis seems to work fine, buit maybe you'll find a better way to implement a slide into this system
		float speedDif = Data.slideSpeed - Rigidbody.velocity.y;
		float movement = speedDif * Data.slideAccel;
		//So, we clamp the movement here to prevent any over corrections (these aren't noticeable in the Run)
		//The force applied can't be greater than the (negative) speedDifference * by how many times a second FixedUpdate() is called. For more info research how force are applied to rigidbodies.
		movement = Mathf.Clamp(movement, -Mathf.Abs(speedDif)  * (1 / Time.fixedDeltaTime), Mathf.Abs(speedDif) * (1 / Time.fixedDeltaTime));

		Rigidbody.AddForce(movement * Vector2.up);
	}
    #endregion


    #region CHECK METHODS
    public void CheckDirectionToFace(bool isMovingRight)
	{
		if (isMovingRight != IsFacingRight)
			Turn();
	}

    private bool CanJump()
    {
		return LastOnGroundTime > 0 && !IsJumping;
    }

	private bool CanWallJump()
    {
		return LastPressedJumpTime > 0 && LastOnWallTime > 0 && LastOnGroundTime <= 0 && (!IsWallJumping ||
			 (LastOnWallRightTime > 0 && _lastWallJumpDir == 1) || (LastOnWallLeftTime > 0 && _lastWallJumpDir == -1));
	}

	private bool CanJumpCut()
    {
		return IsJumping && Rigidbody.velocity.y > 0;
    }

	private bool CanWallJumpCut()
	{
		return IsWallJumping && Rigidbody.velocity.y > 0;
	}

	public bool CanSlide()
    {
		if (LastOnWallTime > 0 && !IsJumping && !IsWallJumping && LastOnGroundTime <= 0)
			return true;
		else
			return false;
	}
    #endregion
}
Uploaded by N2T
'개발 > Unity 내일배움캠프 TIL' 카테고리의 다른 글
| Unity 기존 게임을 포톤 PUN2로 동기화하기 (1) | 2023.10.18 |
|---|---|
| Unity 포톤으로 멀티플레이 구현해보기 (0) | 2023.10.17 |
| Visual Studio 단축키 (0) | 2023.10.13 |
| 유니티 포톤 (Photon) 셋업하기 (0) | 2023.10.12 |
| Unity 포톤 (Photon) (0) | 2023.10.11 |


