
플레이어 이동 구현 방식에는 여러 가지가 있지만, 구현해야 하는 이동 상황이 많아지면 주로 사용하는 것이 바로 FSM(Finite State Machine)이다.
FSM은 상태 패턴을 구현하는 방법 중 하나로 자세한 내용은 나중에 게시글로 따로 다루도록 하겠다.
이번 글에서는 FSM을 이용하여 플레이어 이동 구현하는 방식을 정리해보고자 한다.
프로젝트 세팅
사용된 애셋은 다음과 같다.
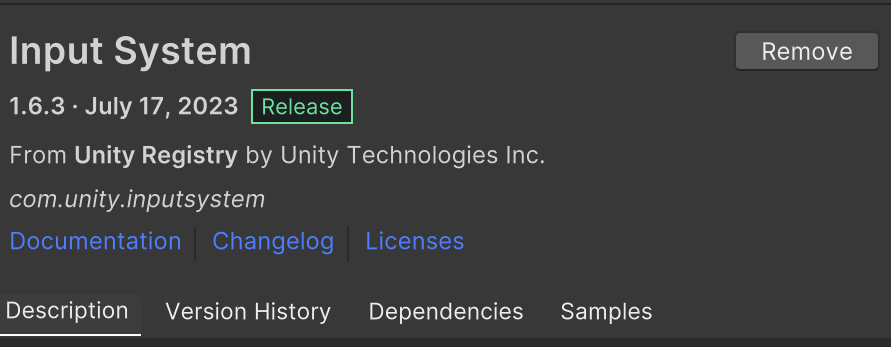
프로젝트 패키지는 Input System을 사용할 것이기 때문에 Package Manager에서 해당 패키지를 임포트해주자.
Input System으로 기본적인 이동 구현하기
프로젝트를 열어서 레벨을 대략적으로 구상하고, 다음과 같이 캐릭터로 쓸 모델을 배치해주자.

아직 아무 작업도 해준 상태가 아니기 때문에 실행을 해도 움직이지 않는다.
이제 이 캐릭터 오브젝트에다가 스크립트 작업을 해주도록 하자.
Input System 패키지를 Import했기 때문에 다음과 같이 Create 메뉴에서 Input System을 만들 수 있는 것을 볼 수 있다.

만들어준 Input Actions를 더블클릭하면 편집할 수가 있게 된다.
기본적인건 다음의 게시글을 참고하자.
 https://seoksii.tistory.com/37#a612b922-13ee-4065-b577-1e057f33bdf2
필자는 다음과 같이 세팅했다.
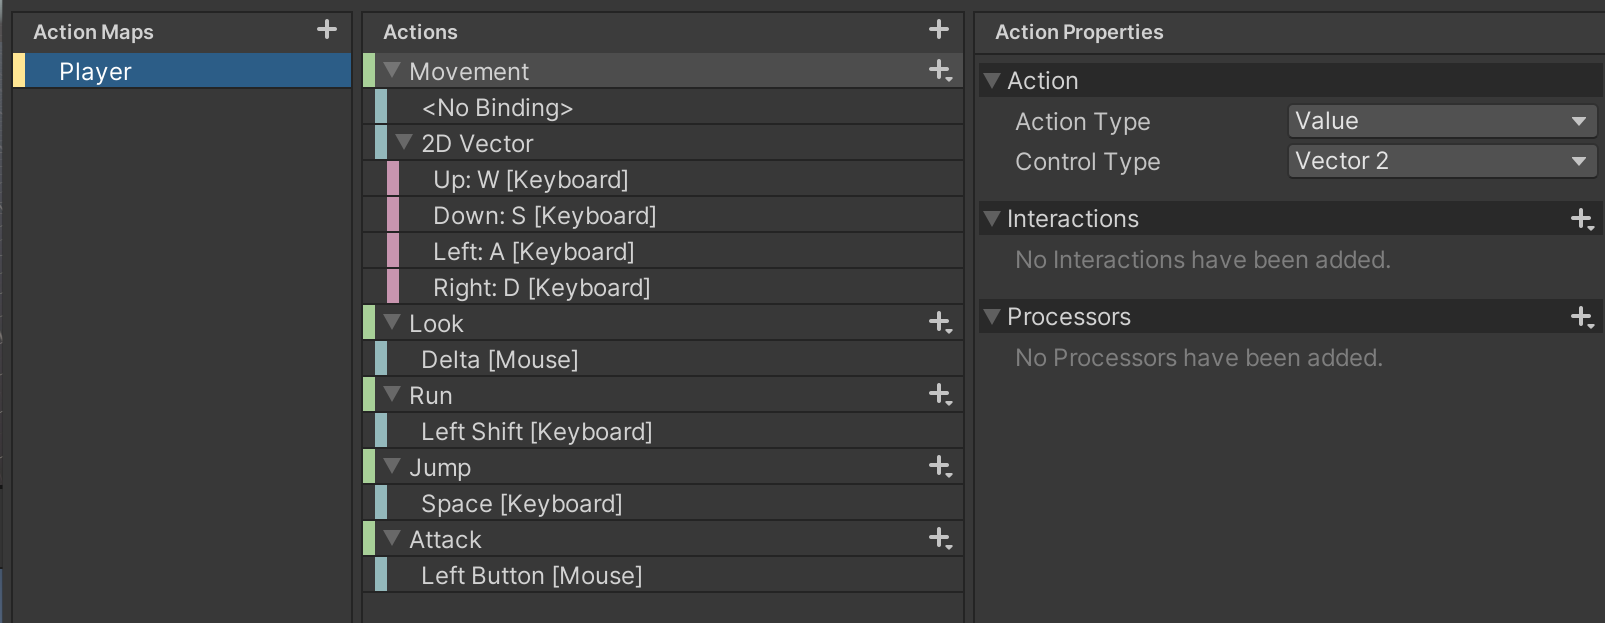
이제 Action Maps를 만들어 놓은 Input Actions를 캐릭터와 연결해주자.
Input Actions와 오브젝트 연결하기
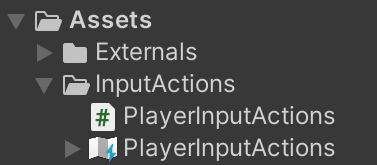
우선 만들어놓은 Input Actions를 Input Actions를 보면 다음과 같이 Generate C# Class라는 항목을 볼 수 있다.
이걸 체크해주자.

체크하고 Apply를 누르면 다음과 같이 같은 이름의 C# 스크립트가 생성된 것을 볼 수 있다.
우리가 설정해줬던 Input Actions의 세부 내용들, 즉 Action Maps라던가 그 안의 Actions들을 스크립트에서 참조하고 싶은 경우가 있는데, 이렇게 Generate C# Class를 통해 스크립트로 만들어주게 되면 다른 스크립트에서 해당 Input Action을 마치 클래스처럼 참조하는 것이 가능하다.
인스턴스를 만들고, 인스턴스 내의 Action Maps 같은 것들을 스크립트에서 다룰 수 있는 것이다.
플레이어에 애니메이션을 받도록 하는 스크립트 작성
스크립트들을 생성해서 다음과 같이 작성해주자.
PlayerInput.cs
using UnityEngine; public class PlayerInput : MonoBehaviour { public PlayerInputActions InputActions { get; private set; } public PlayerInputActions.PlayerActions PlayerActions { get; private set; } private void Awake() { InputActions = new PlayerInputActions(); PlayerActions = InputActions.Player; } private void OnEnable() { InputActions.Enable(); } private void OnDisable() { InputActions.Disable(); } }PlayerInputActions는 우리가 아까 생성해주었던InputActions의 스크립트이다.즉,
InputActions의 인스턴스를 하나 생성해서 그것을 참조해주겠다는 소리이다.PlayerInputActions에서Player를 참조하는데, 이것은 우리가 아까 생성해준 Action Maps이다.OnEnable이나OnDisable같은 함수들은 플레이어가 죽거나 했을 때, 그 때도 InputActions가 유효하게 작동하면 안되기 때문에PlayerInput을 키고 끔으로써InputActions역시 같이 키고 꺼지도록 설정해준 것이다.
PlayerAnimationData.cs
using System;
using UnityEngine;

[Serializable]
public class PlayerAnimationData
{
    [SerializeField] private string groundParameterName = "@Ground";
    [SerializeField] private string idleParameterName = "Idle";
    [SerializeField] private string walkParameterName = "Walk";
    [SerializeField] private string runParameterName = "Run";

    [SerializeField] private string airParameterName = "@Air";
    [SerializeField] private string jumpParameterName = "Jump";
    [SerializeField] private string fallParameterName = "Fall";

    [SerializeField] private string attackParameterName = "@Attack";
    [SerializeField] private string comboAttackParameterName = "ComboAttack";


    public int GroundParameterHash { get; private set; }
    public int IdleParameterHash { get; private set; }
    public int WalkParameterHash { get; private set; }
    public int RunParameterHash { get; private set; }

    public int AirParameterHash { get; private set; }
    public int JumpParameterHash { get; private set; }
    public int fallParameterHash { get; private set; }

    public int AttackParameterHash { get; private set; }
    public int ComboAttackParameterHash { get; private set; }

    public void Initialize()
    {
        GroundParameterHash = Animator.StringToHash(groundParameterName);
        IdleParameterHash = Animator.StringToHash(idleParameterName);
        WalkParameterHash = Animator.StringToHash(walkParameterName);
        RunParameterHash = Animator.StringToHash(runParameterName);

        AirParameterHash = Animator.StringToHash(airParameterName);
        JumpParameterHash = Animator.StringToHash(jumpParameterName);
        fallParameterHash = Animator.StringToHash(fallParameterName);

        AttackParameterHash = Animator.StringToHash(attackParameterName);
        ComboAttackParameterHash = Animator.StringToHash(comboAttackParameterName);
    }
}
왜 이렇게 애니메이션들을 한 번씩 Hash값으로 만들어서 접근을 해주는 것인지 궁금할 수 있다.
string으로 지정된 애니메이션의 속도는 생각보다 매우 느리다.
string을 일일히 비교해가며 참조할 애니메이션을 찾기 때문이다.
따라서 Hash값을 미리 저장해놨다가 해당 Hash값으로 애니메이션을 불러오는 방식을 사용해 퍼포먼스를 훨씬 개선 시킬 수가 있는 것이다.
Player.cs
using UnityEngine;

public class Player : MonoBehaviour
{
    [field: Header("Animations")]
    [field: SerializeField] public PlayerAnimationData AnimationData { get; private set; }


    public Rigidbody Rigidbody { get; private set; }
    public Animator Animator { get; private set; }
    public PlayerInput Input { get; private set; }
    public CharacterController Controller { get; private set; }

    private void Awake()
    {
        AnimationData.Initialize();

        Rigidbody = GetComponent<Rigidbody>();
        Animator = GetComponentInChildren<Animator>();
        Input = GetComponent<PlayerInput>();
        Controller = GetComponent<CharacterController>();
    }
}
Cursor를 lock해주는 이유는 커서를 사라지게 해줘야 다른 곳을 보려고 할 때 커서가 보이지 않아 어색하지 않기 때문이다.
이렇게 스크립트를 작성해주고
완성된 Player.cs를 Player 캐릭터에 붙여주면
플레이어 캐릭터에 애니메이션을 받아줄 준비는 끝난 것이다.
FSM 구성하기
이제 애니메이션의 세부 기능을 FSM으로 구현하기 위해 FSM을 구성해주자.
먼저 IState.cs를 작성해주자.
이름에서 예측할 수 있듯이 인터페이스를 작성하는 것이다.
IState.cs
public interface IState
{
    public void Enter();
    public void Exit();
    public void HandleInput();
    public void Update();
    public void PhysicsUpdate();
}
해당 기능들이 나타내는 것은 다음과 같다.
Enter: 이 State에 들어갔을 때Exit: 이 State를 나갈 때HandleInput: 이 State 중에 입력 처리를 할 때Update&PhysicsUpdate: 이 State에 있을 때 업데이트와 물리적 업데이트
그 다음 해당 State를 여러개 만들어서 StateMachine을 구성하는 것이다.
StateMachine.cs
public abstract class StateMachine
{
    protected IState currentState;

    public void ChangeState(IState newState)
    {
        currentState?.Exit();

        currentState = newState;

        currentState?.Enter();
    }

    public void HandleInput()
    {
        currentState?.HandleInput();
    }

    public void Update()
    {
        currentState?.Update();
    }

    public void PhysicsUpdate()
    {
        currentState?.PhysicsUpdate();
    }
}
플레이어에 대한 상태 정보 구현하기
FSM 안에서 여러 State들을 넘나들게 하기 위해서는 Player에 대한 정보들을 저장할 컨테이너가 필요하다.
여기서는 해당 컨테이너를 스크립터블 오브젝트로 만들도록 하겠다.
PlayerSO.cs
using UnityEngine;

[CreateAssetMenu(fileName = "Player", menuName = "Characters/Player")]
public class PlayerSO : ScriptableObject
{
    [field: SerializeField] public PlayerGroundData GroundedData { get; private set; }
    [field: SerializeField] public PlayerAirData AirData { get; private set; }
}
PlayerGroundData.cs
using System; using UnityEngine; [Serializable] public class PlayerGroundData { [field: SerializeField][field: Range(0f, 25f)] public float BaseSpeed { get; private set; } = 5f; [field: SerializeField][field: Range(0f, 25f)] public float BaseRotationDamping { get; private set; } = 1f; [field: Header("IdleData")] [field: Header("WalkData")] [field: SerializeField][field: Range(0f, 2f)] public float WalkSpeedModifier { get; private set; } = 0.225f; [field: Header("RunData")] [field: SerializeField][field: Range(0f, 2f)] public float RunSpeedModifier { get; private set; } = 1f; }PlayerGroundData.cs에서는 기본적으로 회전, 이동에 대한 것들을 처리한다.BaseSpeed는 기본 이동속도를 의미하고,BaseRotationDamping은 카메라가 회전할 때 부드럽게 회전하도록 만들어주기 위한 댐핑값이다.WalkSpeedModifier와RunSpeedModifier는 모두 각각 걷기 / 달리기 상태일 때 기본 이동속도 대비 속도를 저장한다.
PlayerAirData.cs
using System;
using UnityEngine;

[Serializable]
public class PlayerAirData
{
    [field: Header("JumpData")]

    [field: SerializeField][field: Range(0f, 25f)] public float JumpForce { get; private set; } = 4f;
}
PlayerSO를 만들면 다음과 같이 이동에 필요한 데이터를 편하게 관리할 수 있다.

이렇게 만든 PlayerSO는 Player.cs에 필드로 담아 사용하게 될 것이다.
Player.cs에 다음과 같이 추가하도록 하자.
public class Player : MonoBehaviour
{
    [field: Header("References")]
    [field: SerializeField] public PlayerSO Data { get; private set; }
}
이제 애니메이션을 위한 FSM을 만들기 위한 준비는 끝났다.
본격적으로 FSM을 만드는 것은 다음 게시글에서 다루도록 하겠다.
https://seoksii.tistory.com/57
Uploaded by N2T
'개발 > Unity 내일배움캠프 TIL' 카테고리의 다른 글
| Unity3D FSM으로 플레이어 캐릭터 조작 구현하기 (3) (0) | 2023.10.10 |
|---|---|
| Unity3D FSM으로 플레이어 캐릭터 조작 구현하기 (2) (0) | 2023.10.06 |
| Unity Universal Render Pipeline (URP) (0) | 2023.10.04 |
| Unity3D 프로빌더 사용해보기 (0) | 2023.10.02 |
| Unity 3D 타일맵 최적화 (0) | 2023.09.27 |


